Pages

Saturday 27 November 2010

Barnsley Crop

I have decided to start a crop in our local community centre and here are the details!

When?   8th January 2011

Time?   10am til 1pm

Where?  Doghill Community Centre, Shafton, Barnsley, South Yorkshire

What?  Crafting crop, scrapbooking, cardmaking, anything goes! 

Cost? The cost of room hire will be divided by the number of people who come - the more the merrier cheaper!
Tea and coffee provided.

What else?
Technique classes. 
Totally optional papercrafting sessions on different techniques each month.


Come and join us for a chance to craft with likeminded crafty people! 
If you need more information or directions, please contact me
Jan
X

Thank You Cards for my Lovely Ladies

I have been really brave and using my Designer Series Papers lately!  I am terrible for just looking and stroking the papers, but forced myself to cut it again!

Heres one of the Thank You cards I made for the guests who came to my workshop the other week.

One of the products we saw demonstrated at Convention was the Quick Accents - and, as normal, I had to have some when I come back! 

The scalloped edge is part of the Nursery Suite Quick Accents set and is a die cut strip of self adhesive paper which is fab for quick makes.   Theres lots of strips on one of the 12 x 12" sheets and die cut ovals/circles on the other.

Heres another card using the same sets but giving a different look - just shows how versatile the sets are!


Recipe
Cardstock - So Saffron, Early Expresso, Whisper White
Stamp set - Perfect Punches
Ink - Early Expresso
Designer Series Paper - Nursery Suite
Accessories - Early Expresss Satin Ribbon, Scallop Oval Extra Large Punch, Eyelett Border Punch, Nursery Suite Quick Accents

Hope your having a great weekend?
Jan
X

Wednesday 24 November 2010

Hubby's Birthday Card

Hello!

It was my lovely hubby's birthday last week and heres the card I made for him.


I used the masking technique to stamp the row of  beer glasses (from the Cheers to You stamp set) onto Watercolour Paper and used my inkpads and aqua painters to colour them in.  The Watercolour Paper is lovely and thick (you can certainly see the quality) and its a creamy/off white colour with a lovely texture

To add dimention onto the froth on the glasses I stamped extra images of the glasses out onto Whisper White cardstock and just cut out the froth.  I mounted these over the ones on the watercolour paper using dimentionals and then covered the froth in Chrystal Effects.

The sentiment is from Perfect Punches and all I did was stamp the image in Night of Navy ink onto whisper white card and then trim it using the oval outline of the image as a guide (I made sure there was no white outline).  This was then mounted onto Night of Navy card which was punched out using the Oval Extra Large punch.

To assemble the card I put silver brads in each corner, wrapped Night of Navy 5/8" Grosgrain Ribbon around the watercolour paper and mounted onto a Night of Navy card blank.  The sentiment was positioned on the ribbon and thats it - done!!

He loved the card, but I think the meal at our favourate restaurant in Wakefield went down a bit better!!

Recipe
Ink - Basic Gray, So Saffron, Pumkin Pie, Night of Navy
Cardstock - Watercolour Paper, Night of Navy, Whisper White
Stamp sets - Cheers to You, Perfect Punches
Accessories - Silver brads, 5/8" Grosgrain Night of Navy ribbon, Chrystal Effects, Oval Extra Large punch, aqua painter.
Jan
X

Sunday 21 November 2010

Saturdays Class

Hi there!

Hope you have had a nice weekend - dont they go quick though?  I am sure they lasted longer than this when I was younger.

I held a class on Saturday, and it was the first one for a while so I was a little nervous.  It was a class to show how to get the most out of using the stampin around wheels.  All the ladies who came have bought wheels before but havent really used them that much.

We did basic 'wheeling', making backing paper (we made a One Sheet Wonder) and making borders with mitred corners - and the ladies did really well!

Heres a picture of the cards we made (we did over run a little but they will be able to make many more cards later with the extra cardstock. 


Hope you all enjoyed it ladies? 

Recipe;
Cardstock - Bashfull Blue, Marina Mist, Whisper White and Real Red
Stamps - Sparkly and Bright, Serene Smowflakes, Contempo Christmas
Wheels - Sparkling and Contempo (the ladies also used some of their own wheels in the class for their cards)
Ink - Versamark, Marina Mist, Bashfull Blue, Pacific Point, Real Red and Old Olive
Punches - 1/1/4" circle, Scalloped Circle, Extra Large Ornament, Scallop Trim Border, Modern Label Extra Large and Oval Extra Large.
Accessories - Old Olive and Real Red Satin Ribbin, Silver elastic thread, Light Blue and Dazzling Diamonds Glitter and Silver Embossing powder

Just about recovered now I think!  Will post some of the recent birthday cards I made last week over the next few days so bob back if you get a chance.

Jan
X

Tuesday 16 November 2010

Good afternoon!

I thought I would post the instructiond for making the little box I demo-ed at last weeks workshop.  If I leave it much later I will forget!  Anyway, here goes.

The idea was to show how to make a really simple box for an unusual shaped gift.  It isnt very strong so would only really be suitable for a small, light item, but is SO simple to make.

Measure your item, here we used a standard wheel, and used the SU grid paper as a really quick guide.  The widest part of the wheel was just over 6cm so we used 6.5cm as our measurement.

Cut two strips of A4 cardstock 6.5 cm wide (you need to cut lengthwise) and score the first one at 1cm, 7.5, 14 and 20.5cm cut off the card just after this scoreline.  Fold and crease all the scorelines to give crisp corners and then use a strong glue to secure.


This will give you the inside of the box.


The second strip is going to sit outside the first, so you repeat the scoring above, but before you actually score the card, add one mm to allow the card to 'wrap around' the first strip (hope that makes sence?).  Here is the second strip, attached around the first.

Then you just decorate the box however you like, here I just used my Scallop Trim Border on the front flap, a strip of DSP and ribbon.


Hope the instructions are clear and straight forward to follow.  If you have any questions, please email me.

Recipe
Cardstock - Cherry Cobler
DSP - Jolly Holiday
Accessories - Scalloped Trim Border, Old Olive Satin Ribbon

Sunday 14 November 2010

Workshop Projects

Hi there!

I had a brilliant workshop on Thursday and thought I would share the make and take and Hostess demonstration projects.  The weather was atrocious and there was only a few of us there but it went really well and the Hostess got a free Level 1 Hostess Set plus £25 in freebies!!!

Here is the make and take everyone made.
The card was made using some of the items in the Christmas Bundle offer - Delightful Decorations and the Bauble Punch - more details here.

A 2" strip of Jolly Holliday DSP was adhered to the front of a C6 card blank then I punched out a bauble using the Bauble Punch at one end of the card blank.  A small piece of the same DSP was secured to the inside of the card (this was lined up with the paper on the outside so the patern looked continuous when the card was closed).  You dont have to do this but it did look nice.

We stamped two baubles from the Delightful Decorations set - one in Old Olive, the other in Cherry Cobbler.  These were cut out without leaving any outline and glued, back to back with a length of embroidery thread in between.

A peice of Old Olive was card was punched with the Bauble Punch and the embroidery thread with the baubles positioned so they would sit inside and move freely.  Sticky strip was used to secure the thread to the Old Olive card and a basic rhinestone stuck to each side of the bauble. A strip of Old Olive Satin Ribbon was attached to the top part of the Old Olive card and this was then lined up over the punched out bauble on the card blank and adhered.

Once the card has been written and is ready to send all you do is twist the baubles on the thread a few times and put inside an envelope.  When the recipient takes the card out of the envelope and opens the card, the tension on the emproidery thread will make the bauble spin!

I also demonstrated how to make this really cute box but will post some instructions later on how to make this - I have some serious cardmaking to do today.  Why do we have so many birthdays in November in our family!?
Recipe
Carstock - Cherry Cobbler, Old Olive and Very Vanilla
Stamp Set - Delightful Decorations, Perfect Punches
DSP - Jolly Holiday
Ink - Old Olive and Cherry Cobbler
Punches - Bauble and Scallop Trim Border
Accessories - Old Olive Satin Ribbon, Basic Rhinestones

Enjoy the rest of your weekend and thanks for taking the time to visit.
Jan
X

Tuesday 9 November 2010

Stampers 10 Club

Hi there!

I am starting the next Stampers 10 Club this week and have some slots availailable!!!

All the details for the club are here. But basically, if you commit to ordering £15 per month (plus delivery) in products for the next 10 months, you will get the choice of a free stamp set plus £15 in free items during one of the 10 months the club is running. 

The slot for this month has already been taken, but you will have a choice of months when you agree to joining.  The club starts at the end of this week, so please email me ASAP if you are interested in joining!

Jan
X

Monday 8 November 2010

Cats & Dogs (and not just the weather today!)

The weather today is horrible isnt it?!

I thought I would post the pictures of my own Convention swaps today.  The set I used is called Long Fellows and I had one of those "oh, I have to have that set" moments when I first saw the new catalogue.

When I was thinking of what to make for my Convention swaps I couldnt decide wether to use the cat or dog image from this Level 2 Hostess Set.  In the end I used them both so people could decide which one they wanted.  They went down a storm and I even had a couple of people come to find me to swap (not easy when there are hundreds of people in the room!!

Heres the cat (which seemed more popular than the dog for some reason?)


And heres the dog.

I used the P is for Paw wheel on Whisper White card, trimmed this down to 3" square and matted onto a 4" square of Basic Black card. 

Then I punched out the sentiment using the word window punch and put to one side to be used later.  The cats and dogs were then water coloured using reinkers and aqua paint brushes and cut out really close to the image.

Once I had cut them all out I put them through my crimper.  Not only did this shorten them and give great texture, but I noticed that they could then be curved - so they ended up in lots of different positions!

Heres a few of them all ready to be swapped


As you can see the cats & dogs were then mounted along with the sentiment onto the card

Recipe

Stamps - Long Fellows, P is for Paw Wheel
Cardstock - Basic Black, Basic Gray (Textured), Whisper White
Ink - Basic Gray
Reinkers - Pumpkin Pie (cat), So Saffron (dog)
Punches - Word Window, Modern Label Extra Large, Photo Corners
Accessories - Aqua Painter & Crimper


The swaps I receieved back are beautiful and some of them must have taken hours to make.  So a massive THANK YOU to every one - I cant wait to show them to my lovely ladies.

Hope you have a great day!
Jan
X

Sunday 7 November 2010

More Convention Pics

As promised, here are some more photos of the Annual Stampin' Up! European Convention.  It was held at Addington Palace which is a stunning venue near London.

Swapping on the coach from the hotel to the venue.


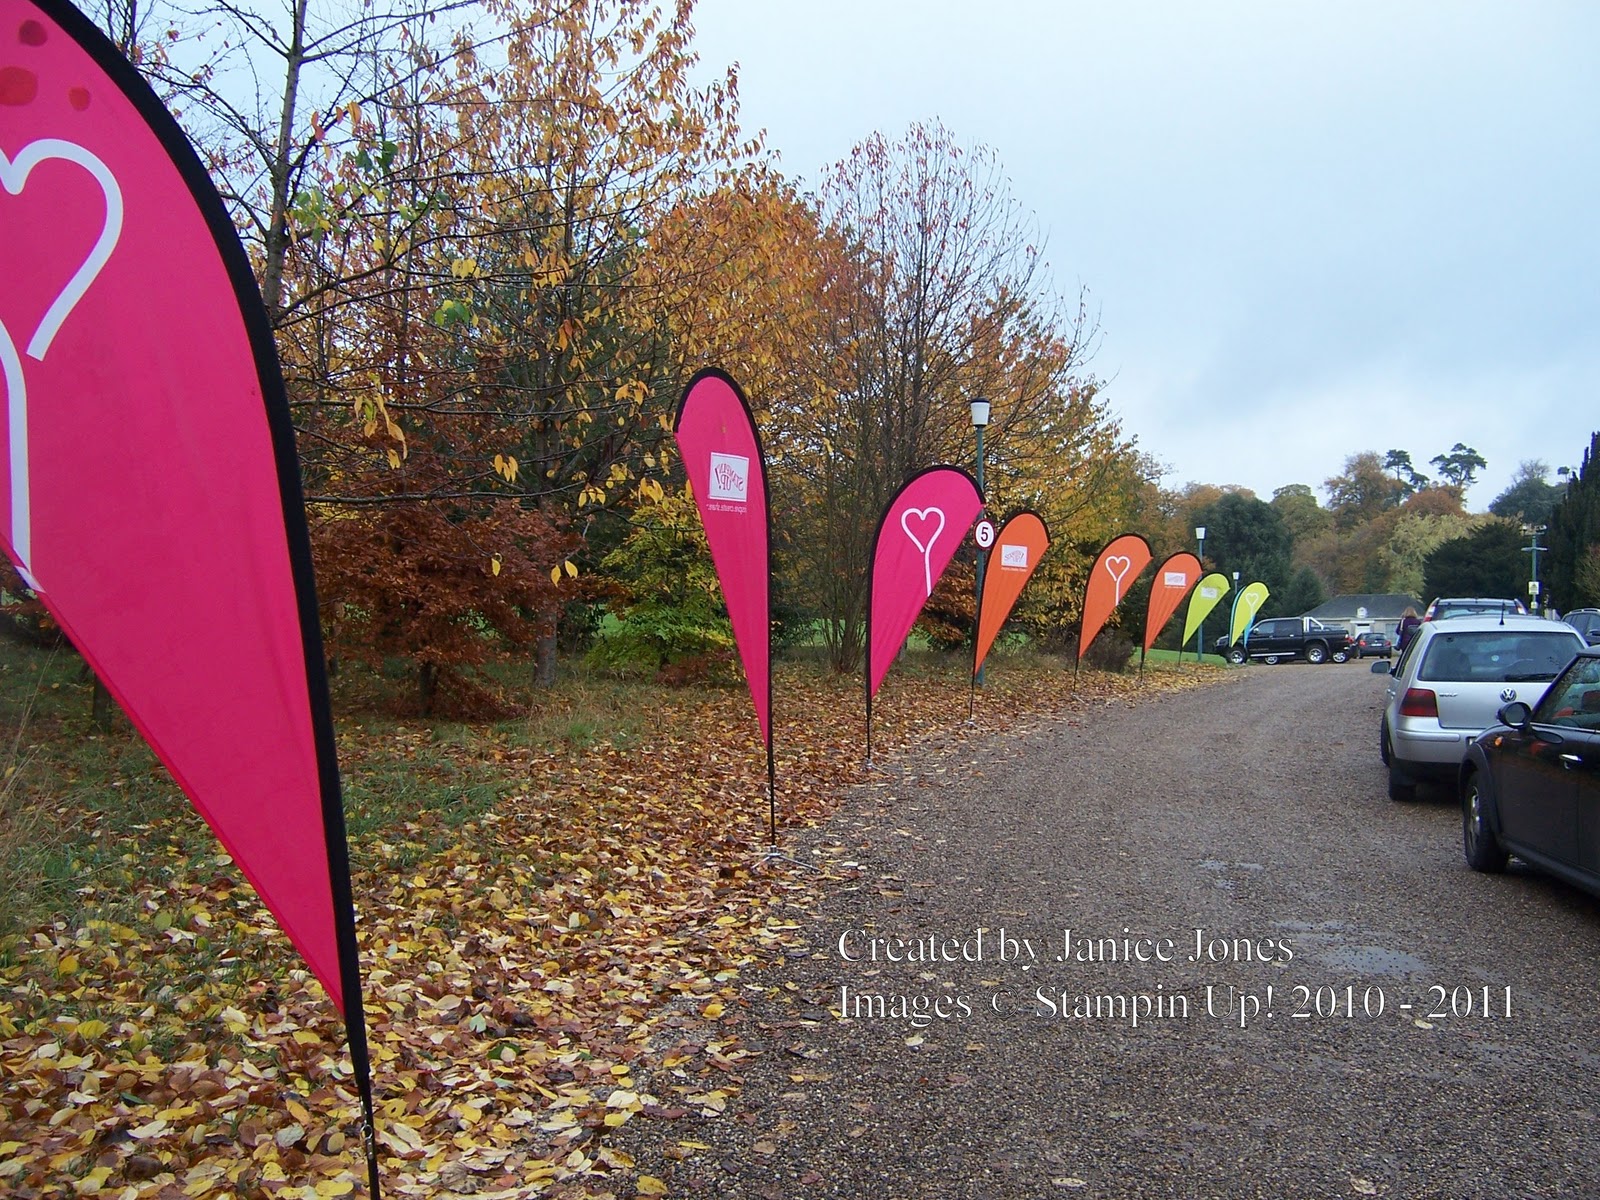
Here are the banners on the approach to the Palace.


Addington Palace is a beautiful building (sorry, I was so engrossed in all the excitement, I forgot to take any photos of the inside of the building!).


Entrance to the event.

Queing to register took a while, but we did meet Blackie the Palace cat, who was so freindly - and not a bit daunted by all the people there.  I made a little tag for my bag using some feathers (we all got a free 'laptop' style bag) and made tags so we could easily see which was our own bag).  Blackie wanted to keep it so I had to wressle it away which was hilarious!

Here we are queing to pick up our bags --- which had our two free stamp sets inside!!!
The main hall was inside a massive marque in the grounds of the palace.  The lighting in the marque made the photos really dark so I havent got many pics of the classes or make and takes that I can post here.  This is one of the few decent ones - with Monica and Paula dancing.  How Paula did this in her massively high heels I have no idea!


There was so much crammed in to the event we didnt get any time to really relax other than the awards night on Friday when we all dressed up in our posh frocks. 

Sara's and my upline, Joanne Friend, got to go up on stage to pick up her award for Demonstrator of the Year and also got a free stamp set plus a pack of Designer Series Paper during Prize Patrol - names are put up on screen and you have to check the screens to see if your name comes up then stand up and clap.  Well done Joanne!

There was lots and lots of swapping with UK, German and French Demonstrators.  The ideas and inspiration from everyone will definately keep me inspired until the next Convention!

And what else can I tell you about Convention? 

Well, there were a few announcements including -
- information about NEXT YEARS Convention.  Its at Disneyland, Paris (wooohooo!!!) in November.
- details of the absolutley GORGIOUS Sale-A-Bration promotion which is on in January & Feb 2011.
- info on an eagerly awaited item coming in the Mini Catalogue in April 2011.
And we also got an additional FREE stamp set (yes, we ALL got one).

Sorry, but I cant share the Sale-A-Bration info until it is officially announced, only demos at the convention have been given the details.  No other demos have the info, even those in the US!

When I originally became a Demo, I would never have dreampt that everything I was told about Stampin' Up! was true - but it is.  The benefits of being a demonstrator are absolutely incredible, I never intended to run my own business when I became a demo (all I wanted was the discounted products!).  But the training, support, free/discounted products and exclusive previews of new items, quickly encouraged me to try and I feel so privilidged to be part of such a fantastic company.

Thanks for bobing over to see me!  I will put some pictures of the swaps on my blog in the next few days.

Jan X

Saturday 6 November 2010

Convention Crazy

 O.M.G. - Convention is MEGGA!!
We have coaches taking us from the hotel to the venue and big banners are placed on the access to the Palace so we couldnt miss the venue.


Here is the stage.


Its my first convention and its been fab so far.  Manic swapping, cueing, shopping and basically a brilliant time.  Sorry, but am having problems with my blog and uploading pics, so will put more photos on soon.

The hotel has been ok, well - apart from them not quite being prepared for hundreds of hungery crafters wanting to have breakfast before the coaches leave.  Oh, and the keys not working for our hotel rooms when we needed to get ready for the awards night!

Anyway, here is the biggest bed I think I have ever seen - it is humongous...

And as its a bit late now, I think I need to get in it - lots more crafting tomorrow!

Thanks for stopping by.
Jan
x
Here we are swapping on the coach to the venue.

Monday 1 November 2010

Bundle Up for Christmas!


This Christmas season get an exclusive package of ribbon for FREE when you purchase a Christmas gift-giving bundle!
Gifted Bundle

                                           Wood-Mount Price     Clear-Mount Price
Gifted Set and
Jolly Holiday Designer
Series Paper                           £35.70                      £30.70

Welcome Christmas Bundle

                                               Wood-Mount Price       Clear-Mount Price
Welcome Christmas Set and
Christmas Cocoa Specialty
Designer Series Paper                 £36.90                             £31.90


Season of Joy Bundle
Season of Joy Set and
So Swirly Stampin’
Around Wheel                             £36.45

Delightful Decorations Bundle
Delightful Decorations Set and
Ornament Punch                          £37.45


Choose from these FREE ribbons:

Mistletoe Ribbon Originals (Retail Value £11.50)
Sleigh Bells Ribbon (Retail Value £8.50)
Riding Hood Red 1-1/4” Striped Grosgrain Ribbon (Retail Value £10.25)
Real Red 3/4” Polka-Dot Grosgrain Ribbon (Retail Value £10.25)

*Bundles and ribbons available while supplies last