Pages

Showing posts with label Sincere Salutations. Show all posts

Friday, 1 October 2010

New Catalogue Launch Party

Its here!

The new Stampin' Up 2010-2011 New Ideas Book and Catalogue is available now. Yey!!!  Its a big file so takes a while to download - but its worth it!

As demonstrators we got to see the new catalogue at the begining of September, and its been soooo hard not letting everyone see how good it is.

I am having a party tomorrow so all my friends and regular customers can see some of the new products including the new colours, clear mount stamps, Colour Coach etc.  Here is the invitation I sent to them.


As I wanted to show them some of the gorgeous new colours I used Marina Mist, Cajun Craze and Crumb Cake.  Now, you will probably look at this combination and think 'I would never have put these colours together'.  But the new Colour Coach takes lots of the hard work out of choosing colours as it has examples of colours which work really well together.

I would also like to invite anyone else who wants to look at the new stuff to come to the party. My friends and regular customers are having the first look - so this invitation is for you to come between 11am and 2pm. Please contact me so I can give you directions to the party!


Recipe
Cardstock - Cajun Craze, Marina Mist and Crumb Cake
Ink - Cajun Craze and Marina Mist
Stamp sets - Vintage Vogue, Sincere Salutations, Tiny Tags
Accessories - Two Step Bird Punch, Medium Jewelry Tag Punch, Linen Thread

I will post some pictures soon of the swaps from a Stampin' Up! training event I went to in Manchester recently so you can see the amazing work of some of the other Demonstrators.

Hope to see you in Saturday, dont forget to contact me for details!!!!
Jan
X

Thursday, 23 September 2010

More Pictures of Birdies

Good morning!

I promised on Monday to show you the other cards I made at the weekend using the Sweet Pea DSP.

Here they are...


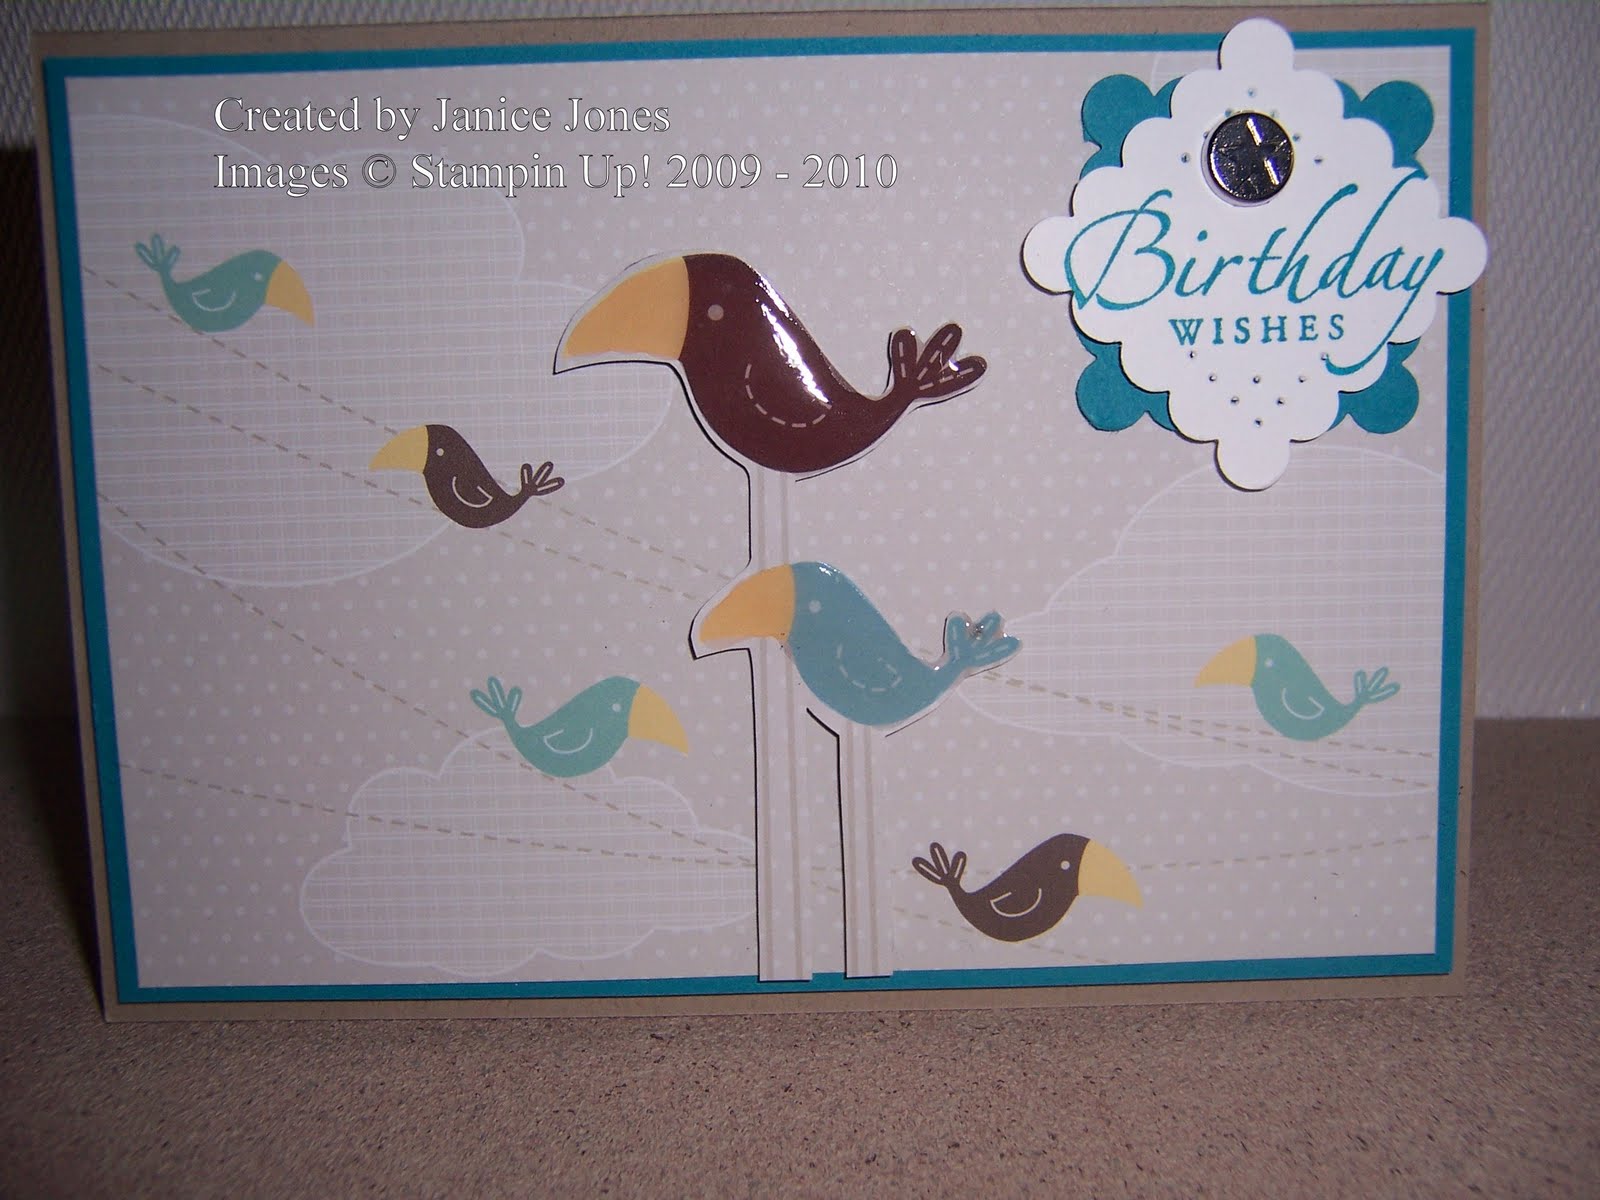
I used the scalloped sqare punch at an angle for the sentiment and then mounted on a piece of Taken With Teal cardstock (I love this colour - cant believe its retiring next week!!!).  I then secured them with a brad from the Pretties Kit.  As in Mondays post, I covered the central bird images with Chrystal Effects and mounted on Dimensionals.

For this card all I did was use the DSP, mounted onto Chocolate Chip cardstock and used punched shapes to decorate and for the sentiment. 

Recipe

Cardstock - Taken With Teal, Chocolate Chip, Whisper White
Stampset - Sincere Salutations
Accessories - Crystal Effects, Brad (Pretties Kit)
Punches - Large Oval, Large Scalloped Oval, Scalloped Square


Thanks for stopping by.  I will be having my Open Day next Saturday (2nd October) so if you fancy bagging a bargain and the chance to get some free products from the new catalogue, please contact me ASAP.  Its going to be a busy day so book your place to make sure you get a seat!

Jan
X

Monday, 20 September 2010

Happy Monday!

Hi everyone!

Hope you are all raring to go for another week?

I had a lovely weekend and got round to making a few cards for a change! I even managed to use some of my Sweet Pea Designer Series Paper - for some reason I end up looking at the gorgeous DSP Stampin' Up! do but just cant bring myself to use it!!!


This was such a quick and easy card to make.  I trimmed a piece of DSP to mount onto a layer of Taken With Teal cardstock then used my Crop-a-dile to secure a couple of Jumbo Eyelets onto one side.  A knot was tied in a short length of Chocolate Chip 5/8 Grosgrain ribbon which was then treaded through the eyelets.

The two birds in the middle of the card were cut out of a sheet of DSP, covered in Crystal Effects and then when dry, mounted on Dimentionals. 

Wish I knew why I struggle to use DSP, the only reason I can think of is that its so nice I dont want to make any mistakes!  I really must try harder...

Recipe
Cardstock - Taken With Teal, Chocolate Chip, Whisper White
Stampset - Sincere Salutations
Accessories - Jumbo Eyelets, 5/8 Chocolate Chip Grosgrain Ribbon, Crystal Effects
Punches - Large Oval, Large Scalloped Oval

Will post more pics of the other cards I made over the weekend later,  off to get some work done now - busy week ahead!

Jan X

Wednesday, 7 July 2010

Dashing Dasher

Whilst getting ready for my Christmas in July class this Saturday, I made this card using Dasher (How cute is he!!?).


Dasher was stamped in Versamark onto Real Red carstock and then Heat & Stick powder sprinkled over the stamped image before it dried.  This was then heated to melt the powder to give you a glue like substance.  You can then use glitter or other fine materials to stick securely to the card.  For this card I used some guilding flakes (like gold leaf).

The circles on the corners of the main image and the sentiment were stamped and heated in the same way.  I used the small star image from the 'Serene Snowflakes' and Holiday Greetings from 'Sincere Salutations'.

I used the 1/2" circle punch to remove the corners of the Dasher image and then punched out the small stars with the same punch.  These were then mounted onto Designer Series Paper (DSP) form the Christmas Jingle Simply Scrappin set and then again mounted onto more Real Red cardstock.

Although I like the effect with the flakes I think the next ones I make I will use white embossing powder as the flakes are difficult to use on the delicate star and sentiment images.  White embossing powder will give a finer more defined image.

Recipe
Stamp sets - Dasher, Sincere Salutation and Serene Salutations
Cardstock - Real Red and Old Olive
Ink - Versamark
DSP - Christmas Jingle
Accessories - Real Red Satin Ribbon, Rhinestone Brad (Circle Fire)
Non SU - Guilding flakes from stash

Thanks for stopping by.
Jan

Saturday, 22 May 2010

Studio Sketches

This weather is so nice isnt it - I just love the sunshine.

Well, we have finally recieved details of the location of the Stampin' Up! European Convention - and I am such a giddy kipper!!!  Its going to be in Croydon, just outside London on the 5th and 6th November.  The hotel looks amazing and for two days it will be full to the rafters with crazed crafters (disguised as SU Demonstrators) from all over europe and the US. 

Last years convention was held in Frankfurt, Germany and as I hadnt been to one before I made the mistake of thinking I wasnt bothered about going.  BIG mistake - I have regretted it ever since.  But, not this year!!!

Anyway, I have five months to wait until then, so I had bettter come back down to earth for a while.  Here are a few cards I made this week (in between traveling to Lincoln & Margate for work). 


The stamp set is lovely - not the usual cutesy sort and its called Studio Sketches. I liked it as soon as it came into the Mini Catalogue, but only got round to getting it recently.


The distressing techniques are ones we used in Sara's Vintage Vogue Class a couple of weeks ago (she has another one planned for 3rd July!).


The text images are created by inking the En Francais backround stamp with Soft Suede ink on to Soft Suede card.


Recipe
Cardstock - Soft Suede, Kraft, Whisper White
Ink - Soft Suede
Stamp Sets - Studio Sketches, En Francais, Occassional Greetings, Bird on a Branch, Sincere Salutations
Accessories - Cutter Kit, Brads & Sponge Daubers, Watercolour Wonder Crayons.

Off back to do more crafting now - have a great weekend.
Jan

Thursday, 22 April 2010

Simply Said

It was my Sister In Laws birthday the other week (I am not going to give her age away!) and I used the template from my Hubbies wedding anniversary card to make an unusual card blank.

The I stamped out the flowers and then used my Stamp-A-Ma-Jig to overlay the first image with the darker colour then cut them out.  I raised some of the flowers on dimentionals to give some depth. 

The butterflies were stamped with Pixie Pink ink, dots of glue applied and then Rose Pink Fine Cosmo Glitter was sprinkled on top.  Once dry, I punched the butterflies out and secured using dimentionals.

Recipe
Carstock - Gable Green, Pixie Pink, Whisper White
Ink - Pretty in Pink, Pixie Pink.
Stamps - Simply Said, Sincere Salutations, Flight of the Butterfly
Punches - Oval Scallop, LArge Oval, Butterfly, Eyelet Border
Accessories - Rose Pink Fine Cosmo Glitter, Whisper White Taffeta Ribbon. 

Monday, 7 December 2009

Fab Weekend!

Been crazily busy lately with work and havent had a minute to myself but I took Friday and today off as holiday which gave me a lovely long weekend.  I put my Christmas tree up on Friday and got loads of other bits & bobs done which has been great. 

I even had some time on Sunday to get some cards done (being as we sold most of the ones we had at the Felkirk Church craft fair in November!).

My Mum is feeling much stronger and I have had a fantastic day today - I took her Christmas shopping, to Meadowhall!!!  She had to stop for a sit down every now and then but she loved it - we are SOOOO looking forward to Christmas.

Here is one of the cards I made on Sunday using the Silent Night set, but to make it slightly different I made a tag from the sentiment stamp.


To make the topper, the church image was stamped onto Whisper White card and mounted it onto Boardering Blue cardstock. Then I turned it over and put Sticky Strip really close to the edges and the bottom.  This created a pocket when it was stuck onto the front of the card.


I trimmed the card with the sentiment on and again mounted it onto card, trimming really close to the edge.  I then created a hole and threaded ribbon through.  The tag then slips nicely between the card blank and topper.

Havent had the time to add the glitter yet. Thought I would have a 'glitter day' and do all the glittering for my cards in one go.  At least then I will only be wearing it for one week instead of 2 or 3!!!

Recipe:
Stamp sets; Silent Night, Sincere Salutations
Cardstock; Whisper White, Real Read & Boardering Blue
Ink; Bordering Blue
Accessories; Real Red ribbon, Scalloped Oval punch.

Saturday, 7 November 2009

Thank You!


Mum is doing really well!!  She is on a general ward and definately getting back to her normal self.

Finally got round to making some thank you cards for the staff at the hospitals my Mum has been treated at - and enjoying a bit of chill out time. 

Here is one of the cards I made using the 'In My Garden' set. It is really sweet and is a Level 1 hostess set.  You can get the set by placing an order or holding a worksop with sales totalling the qualifying amount.  I also have some places left in my Stampers 10 Club (details here).

I stamped the images using white pigment ink onto vellum cardstock, turned the cardstock over and then coloured the image from the back using markers.  This gives a gorgeous stained glass effect which looks really pretty.  I then punched the image out and mounted it on Mellow Moss cardstock to highlight the colours.

I punched circles out of the card blank and positioned the images through the holes, glueing them to the back part of the card blank.  I finished off the card using a piece of Certainly Celery ribbon, a chrystal brad, and a sentiment trimmed to fit one of the Hodgepodge Hardware frames.  The peircing along the bottom of the card was done using the piercing tool and mat set (so pleased with this!)

Recipe:
Cardsock; Vellum, Mellow Moss, Barely Banana
Stamp Sets; In My Garden, Sincere Salutations
Ink; Certainly Celery, Marvelous Markers
Accessories; Hodgepodge Hardware and brads, Certainly Celery ribbon, chrystal brad (Pretties Kit), piercing tool & mat set, Circle punches.

Thanks for stopping by!
Jan